Top Techniques for Effective Paint Correction
Table Of Contents
Step-by-Step Guide to Paint Correction
Before starting the paint correction process, ensure you have the right tools and products on hand. Gather items such as wash buckets, quality car soap, microfibre towels, clay bars, polishers, and the necessary compounds. Carefully wash and dry your vehicle to remove any surface dirt and debris. This initial step sets the stage for effective correction. After washing, use a clay bar to remove embedded contaminants that washing alone cannot eliminate. This will help create a smooth surface, making it easier to assess the extent of imperfections in the paintwork.
Once the vehicle is clean and prepped, evaluate the paint condition under good lighting. Look for scratches, swirl marks, or oxidation. Different imperfections may require specific compounds or pads for correction. Begin with a test spot, applying a small amount of compound or polish, then use a polisher or a dual-action tool to see which approach provides the best results. Assess how the paint responds, adjusting your technique as necessary. This methodical approach will help ensure that the rest of the correction process is as effective as possible.
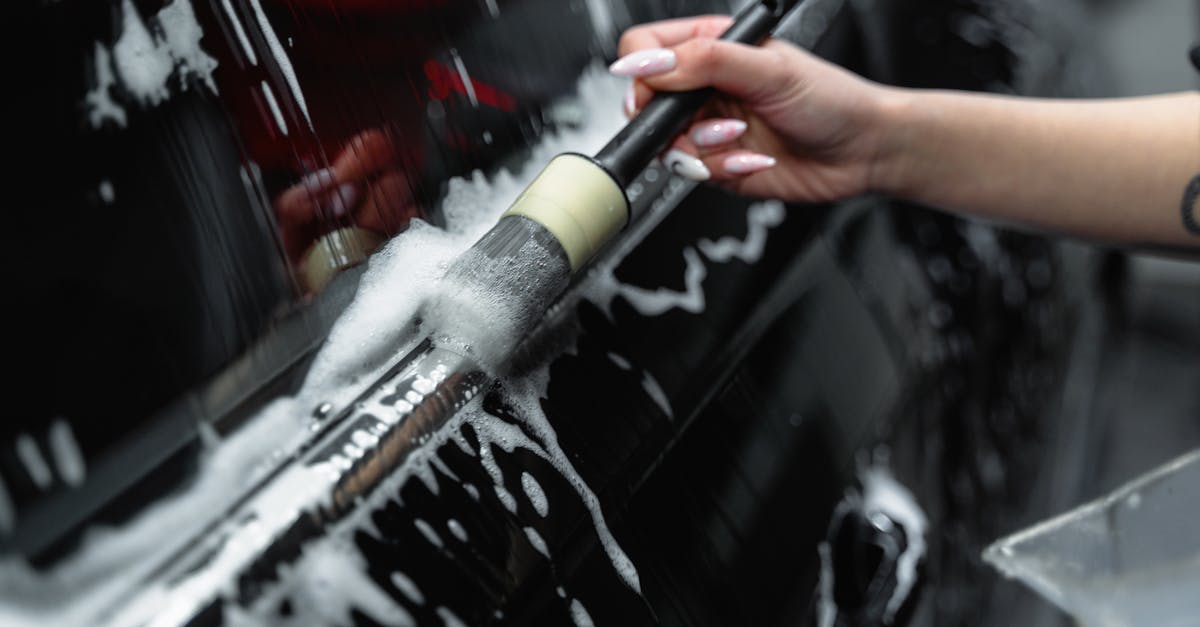
Preparing Your Vehicle for Correction
Before commencing any paint correction, it is essential to thoroughly wash the vehicle. Start by removing dirt, grime, and road contaminants using a pH-balanced car shampoo. Pay particular attention to the wheels and lower panels, where debris tends to accumulate. After washing, consider using a clay bar to eliminate embedded particles that the wash may have missed. This step ensures a clean surface, which is critical for achieving optimal results during the correction process.
Once the vehicle is clean, inspect the paintwork for imperfections. Look for swirl marks, scratches, and oxidation that require correction. Conducting this assessment in good lighting can help identify issues more accurately. If any sealants or waxes were applied previously, these should be stripped away to allow the correction products to bond effectively with the paint. This preparation phase establishes a solid foundation for the upcoming polishing techniques.
Polishing Techniques Explained
Polishing is a crucial step in the paint correction process, allowing for the removal of fine scratches, swirls, and oxidation. The selection of the right polishing pad and machine can significantly affect the outcome. For instance, a dual-action polisher is ideal for beginners, providing a more forgiving approach to paint correction. In contrast, a rotary polisher can achieve quicker results but requires a steadier hand and more experience to avoid damaging the paint.
Different types of polishing compounds exist, catering to various needs and paint conditions. An aggressive compound is suitable for heavily damaged surfaces, while a medium or fine polish can enhance the gloss on already good paintwork. Understanding the condition of the vehicle’s paint will guide the selection of the appropriate product. This knowledge, combined with proper technique, can effectively restore the vehicle's finish to a desirable state.
The Role of Compound and Polish
Compounds and polishes play distinct yet complementary roles in the paint correction process. Compounds are typically more abrasive, designed to remove deeper imperfections such as swirl marks, scratches, and oxidation. These products contain larger particles that help to cut through the surface layers of the paint, revealing a smoother finish underneath. The aggressive nature of compounds requires careful application to avoid further damaging the paint, especially on softer clear coats.
Polishes, on the other hand, are formulated with finer abrasives and are used to refine and enhance the surface after the initial correction has been completed. They help to eliminate any micro-marring or haze left behind by the compound. The result is a high-gloss, mirror-like finish that enhances the overall appearance of the vehicle. Using a combination of both products allows detailers to achieve a flawless surface, maximising the depth and clarity of the paint while ensuring it is well-prepared for any protective coatings that may follow.
Protecting the Finish After Correction
Once the paint correction process is complete, maintaining that flawless finish requires some essential steps. Applying a high-quality sealant or wax helps to create a barrier against contaminants and UV rays. Sealants provide longer-lasting protection, often being more durable than traditional waxes. They enhance the paint’s gloss and depth while ensuring that dirt, grime, and pollutants do not bond to the surface. Regular maintenance washes are crucial for keeping the finish pristine; using a pH-neutral shampoo will prevent stripping away the protective layer.
In addition to sealants, ceramic coatings have gained popularity for their advanced protection. These coatings form a hard, hydrophobic layer that repels water and makes cleaning easier. With a ceramic coating, the need for frequent polishing is reduced as it helps resist minor scratches and swirl marks. It's essential to follow the manufacturer’s recommendations for application and curing times to achieve optimal results. Regular inspections and touch-ups will help ensure that the paint remains in excellent condition for years to come.
Best Practices for Paint Protection
Using a quality wax or sealant can enhance the longevity of your corrected paint finish. These products provide a protective layer that shields against UV damage, dirt, and other environmental contaminants. Regular application also helps maintain the shine and can make washing easier. Consider selecting products specifically formulated for your vehicle's surface type to achieve the best results.
Incorporating proper washing techniques contributes significantly to preserving paint correction. Using a pH-neutral car shampoo prevents damage to the protective layer. Microfibre mitts and drying towels minimize the risk of scratching. Avoid automatic car washes with brushes, as these can create swirls and marring. Instead, opt for hand washing to maintain the integrity of your paint.
FAQS
What is paint correction?
Paint correction is the process of removing imperfections from a vehicle's paint surface, such as swirl marks, scratches, and oxidation, to restore its original shine and clarity.
How do I prepare my vehicle for paint correction?
To prepare your vehicle for paint correction, start by thoroughly washing and drying it to remove dirt and debris. Next, decontaminate the surface using a clay bar to eliminate any embedded contaminants.
What are the different polishing techniques used in paint correction?
Common polishing techniques include one-step polishing, which uses a medium polish to remove imperfections, and multi-step polishing, which involves multiple products for a more precise finish. It's essential to choose the right technique based on the condition of your vehicle’s paint.
What is the difference between compound and polish?
Compound is a more abrasive product used to remove significant imperfections and clear coat damage, while polish is less aggressive and is used to refine the paint surface after compounding, enhancing gloss and clarity.
How can I protect my vehicle's paint finish after correction?
To protect your vehicle's paint finish after correction, apply a quality wax or sealant to create a barrier against environmental contaminants. Additionally, consider using ceramic coatings for long-lasting protection.
Related Links
The Best Tools for Achieving Flawless Paint CorrectionUnderstanding the Importance of Paint Correction in Adelaide
How Weather Affects Car Paint and Correction Approaches