Step-by-Step Guide to DIY Paint Correction
Table Of Contents
Machine Polishing Basics
Understanding the fundamentals of machine polishing is crucial for achieving a flawless finish on your vehicle's paintwork. Machine polishers operate by using rotational or oscillating movements to apply polish and compounds, helping to remove imperfections such as swirl marks and light scratches. These tools vary in power and speed settings, allowing for a customised approach depending on the condition of the paint.
When selecting a machine polisher, consider the type that best suits your needs. Dual-action polishers are user-friendly and ideal for beginners, providing a safe way to work on paint without excessive risk of damage. Rotary polishers, while more powerful, require a bit more skill to operate effectively as they can generate heat and potentially burn through the clear coat if not handled correctly. Knowing these basics will set a strong foundation for your paint correction journey.
Types of Polishers and Their Uses
Several types of polishers are available, each designed to tackle specific tasks in the paint correction process. Rotary polishers are popular among professionals for their ability to remove deep scratches and imperfections quickly. They operate at higher speeds, which can bring out a high-gloss finish. For those new to paint correction or seeking a more forgiving tool, dual-action (DA) polishers are ideal. They combine rotary and orbital motion, providing a safer method that reduces the risk of burning through paint while still achieving excellent results.
Using the right polisher can drastically impact the effectiveness of your paint correction efforts. Random orbital polishers are versatile, making them suitable for a variety of applications, from gentle polishing to cutting through oxidised finishes. Smaller, more compact models, like mini or palm polishers, excel in tight spaces and intricate areas. Understanding the strengths and weaknesses of each type of polisher will help you choose the best tool for your specific needs.
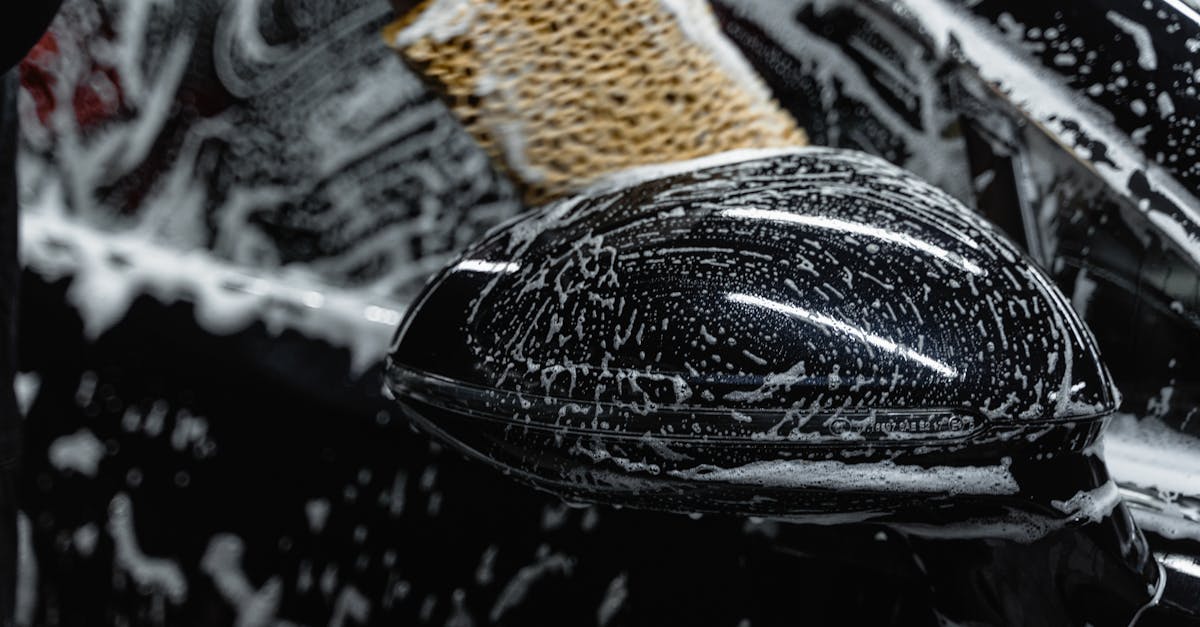
Applying Compound and Polish
Before applying any compound or polish, ensure that the surface of the car is clean and dry. Use a pH-neutral car wash and microfiber cloths to remove dirt and contaminants. For best results, work in a shaded area to prevent the products from drying too quickly under direct sunlight. Apply a small amount of compound or polish to the pad, spreading it evenly before engaging the polisher to avoid splatter. It is essential to use the right amount of product; too much can lead to an uneven finish, while too little may not provide the desired correction.
When using a dual-action or rotary polisher, maintain a consistent speed and pressure on the surface. Start with a slow speed to spread the compound or polish before increasing to a medium speed. Move the polisher in overlapping passes, covering the entire area without lingering too long in one spot. This ensures an even application and helps avoid heat build-up that could damage the paintwork. Regularly check the pad for product build-up and clean it as necessary during the process to maintain effectiveness.
Techniques for Even Application
Achieving uniform application of paint correction products is crucial to obtaining a flawless finish. When using a polisher, apply the compound or polish in small, manageable sections. This method allows better control over the product, reducing the risk of streaks or uneven coverage. Maintain a consistent speed and pressure while working the polisher over the surface. Overlapping passes by about 50% ensures that all areas receive an even coat.
Using the right pad for the type of polish can significantly enhance the effectiveness of the application. For instance, a foam pad works well with lighter polishes, while a wool pad is suitable for more abrasive compounds. Additionally, it’s important to avoid excessive product application as this can lead to build-up, which can cause swirl marks. Cleaning the pad regularly during the process prevents product transfer issues and keeps the working area tidy, aiding in a smooth and even application overall.
Inspecting Your Work
The inspection phase is crucial in assessing the effectiveness of your paint correction efforts. Begin by examining the surface under proper lighting conditions. Natural light is often the best option, as it reveals imperfections that artificial lighting might mask. Look for swirl marks, hazing, or any areas that may require further work. A close-up inspection can help identify subtle defects, ensuring no detail goes unnoticed.
Utilise your fingertips to feel the smoothness of the paint. A properly polished surface should feel glassy and slick to the touch. If there are rough spots or unevenness, it may indicate that the polishing process was insufficient in those areas. Don’t hesitate to revisit any spots that need improvement. Using a flashlight can also aid in spotting finer flaws, allowing for a comprehensive assessment of your work's overall quality.
How to Evaluate the Results
After completing the paint correction process, a thorough inspection of the surface is essential to assess the effectiveness of your work. Begin by examining the paint under various lighting conditions, such as natural sunlight and artificial light. Look for any remaining swirl marks, scratches, or imperfections. This step is crucial as it allows you to identify areas that may require additional attention or refinement.
A close-up inspection can reveal imperfections that aren’t always visible from a distance. Use your fingers to lightly feel the surface; a smooth finish indicates that you’ve achieved a successful correction. If any spots feel rough, it may be necessary to revisit those areas with a suitable polish. Taking the time to evaluate your results ensures a high-quality finish and restores the paint to its best possible condition.
FAQS
What is paint correction?
Paint correction is the process of removing imperfections from a vehicle's paint surface, such as swirl marks, scratches, and oxidation, to restore its original finish and shine.
Do I need special equipment for paint correction?
Yes, for effective paint correction, it is recommended to use a dual-action or rotary polisher, along with the appropriate compounds and polishes designed for your vehicle's paint type.
How do I choose the right polisher for my DIY paint correction project?
When selecting a polisher, consider factors such as your experience level, the size of the areas to be polished, and the type of paint on your vehicle. Dual-action polishers are generally more user-friendly for beginners.
How can I ensure an even application of polish?
To achieve an even application, work in small sections, use a moderate amount of polish, and apply consistent pressure while moving the polisher at a steady speed. It’s also important to use the correct pad for your specific polishing compound.
What should I look for when inspecting my work after paint correction?
After completing the paint correction, inspect the surface under different lighting conditions to check for any remaining imperfections. You should see a smooth and reflective surface without noticeable swirls or scratches.
Related Links
Common Paint Defects and How to Correct ThemThe Best Tools for Achieving Flawless Paint Correction